D U E D A T E S
(R e m i n d e r)
November 7, 14, & 21
Respective essay and
presentation dates for
the course paper topic.
See the 'Essay' post on
this course blog for the
date you fall under.
November 19
Your Project 6.
Posted in required form
onto your blog with a
statement about them.
In addition to project file turn-in.
★ ★ ★ ★
P R O J E C T 6
F a n t a s y a n d R e a l i t y
(Digital, 3D models of talismans in comparison
and contrast with real life photography of it.)
In two different models. The singular object
model and the collage model.


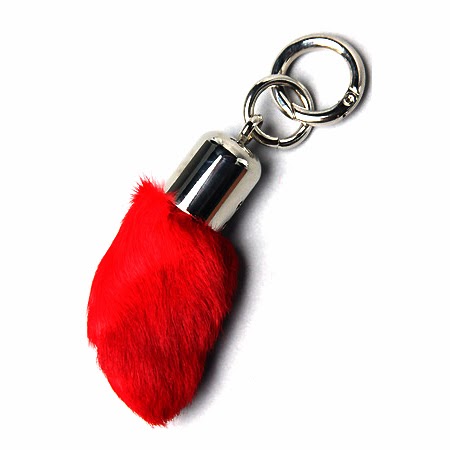
Above : My own models/splices.
Below : Mock reference images.


Click on SketchUp logo to be taken to free download/install page. For Mac or PC.
For a lot of people, this will be an entry into digital, 3D modeling for the first time. This section will serve to that mind frame, while helping those more intermediate towards gaining a better understanding. Our tool of choice : Google SketchUp. At once, a good beginner's tool with plenty of technical opportunities. Fun, to boot.
Recommended : A three button mouse. i.e. Two buttons and a middle wheel. It will prove critical to establishing a good workflow with 3D modeling.
OBJECTIVES
1.) Take two photos for the assignment : One of a detailed, singular object of significant meaning to you, and one of a cluttered collage of items also of significant meaning to you. It is optional to choose a photograph previously taken as well, for either of the two criteria above. The singular object can vary in scale, but would not go above 6 in' x 6 in' x 6 in' if you are at all interested in the extra credit possibility (see further below).
What is meaning? Hard to define for everyone, so I leave it up to you. A nostalgic item of childhood? Something highly representative of your hobby or career choice? Something you may even dislike, but it has some impact on your life anyway? Up to you. But have your two photos at disposal for the next step.
2.) Two separate digital, 3D models using SketchUp of each of the objects in the two photos. One model for the singular object and its background, and one model for your collage of objects in its respective environment or background as well. For reference, see my two example models at the top.
3.) Respectively, I am setting a minimum requirement of faces for each of the two models as well. 800 faces for the singular object, and 3500 faces for the collage. Viewable in SketchUp by going to Window -> Model Info -> Statistics. If you believe your object(s) for either of the two models are a little on the underdetailed side, consider either going further with your model or choosing a different object to begin with. For example, a single orange or a TV dinner box will probably not suffice. Below is the info of my two examples-


4.) Position your viewpoint looking at the objects as similar as possible to the photo you are basing the respective models off of. After all is done visually with modeling, materials, and lighting, export a 2D image. File -> Export -> 2D Image.
5.) The finale. Splice together your real photo and digital model side by side via Photoshop so they are viewable directly next to another or stacked (again, see my examples). Minimum 1000x1000 resolution on that spliced image, for quality purposes. We will likely print these as well. My suggestion : Just open a new image in Photoshop 2000x2000, copy and paste the two images within, and crop/place fittingly. You are absolutely allowed to do image correction to your exported images from SketchUp to fit the mood of your original photo. I encourage it, even.
6.) The turn-in. Post both your model splice images onto the blog with a brief statement for each addressing the relevance of the object(s), why you chose them, and challenges/successes you had while modeling. We will look at them in critique. As well, I will be asking for copies of both of the original SketchUp project files in a folder on the main computer. To look at them in 3D view in critique, and to confirm face total requirements.
The final result : an attempt at simulation of reality. Perhaps even resulting in the defeat of reality. And so forth. An old art question : what looks better? Realism or the abstract? Keep the SketchUp project files as well, for we will need an exported 3D model from one of them after Project 6's conclusion for the final.
Class time for weeks 9 and 10 will be heavily devoted to in-class demos, exercises, and work time solving issues with 3D modeling and completing an appealing project! Be meaningful as you wish with objects/photos selected. And above all else, creative.

A primer that I have made.
Upon the first day of SketchUp demos, you will receive this sheet as well. I made all the commands you should need to know about modeling in SketchUp fit on one, minimal sheet. Though it is only by experience you'll get the most out of your visuals. Consider me a primary resource for this project.
http://sketchup.google.com/3dwarehouse/ ; Hundreds of pre-made models and components you can reference as inspiration for your model. There is a 3D view on each model page.
https://sketchfab.com/browse/staff ; A website where you may also view objects in 3D, though not all of them are created in SketchUp. Inspiration, nonetheless.
http://www.sketchup.com/intl/en/community/gallery.html ; Community gallery.
http://sketchupprojects.com/ ; Another community gallery.
http://www.wired.com/design/2013/08/a-lego-set-with-no-instructions-for-budding-architects/ ; An interesting article championing architectural concepts over step-by-step instructions.
★ ★ ★ ★
E X T R A C R E D I T O P P .
T h e t h i r d l a y e r :
A 3 D p r i n t .

Print done (and cleaned up) from on campus.
Left : Our Makerbot. Right : Delamare Library.
DUE December 5th, final physical meeting.
For the credit of two letter grades to your lowest assignment, or out of sheer interest and insurance, you may acquire and clean up a 3D print of your first model for Project 6 (the singlular object). As true to the original scale as possible.
Two locations are available for this : There is a 3D printing lab at the Delamare Library on campus north of the big grass quad. You may submit to them a .stl file (their preference) to be printed for a fee depending upon scale by inches. OR, we have an operational Makerbot/3D printer in the lab next door. Upon request from Dillon and proper planning with him, you may get a print done there for free using an .stl file or .dae. Though the Delamare printer is more industrial and reliable. The choice is yours. If you choose Delamare, contact me about converting your .dae into an .stl. I implore you ask Dillon about 3D printing immediately if you want to choose our lab as a route, too.
Turn in for extra credit is two ways; show-off your model in front of the class at the final physical meeting (Dec. 5). With, if accessible, the real object you based the model off of. And re-turn in your singular object Fantasy/Reality splice. Adding a same perspective photo of the 3D print. (Three photos total; the original photo, digital model image export, 3D print model; all side by side or stacked).
Perform this, and you will be awarded the points.
Good luck.
.
No comments:
Post a Comment